On busy weeknights, a quick and flavorful dinner can be a lifesaver. This air fryer chicken breast recipe has become a go-to solution in my kitchen because it’s fast, delicious, and incredibly versatile. In just about 15 minutes, you get golden-brown, juicy chicken that works with almost any meal. From hearty rice bowls and fresh salads to tacos, wraps, or a simple protein for a weeknight dinner, these spiced chicken slices fit the bill perfectly. Using the air fryer means less hassle and healthy, tasty chicken on the table in no time – a win for any busy home cook!
Why This Recipe Works
- Thin Slices, Juicy Results: By slicing boneless, skinless chicken breasts into thinner cutlets, they cook quickly and evenly. The fast “flash-cooking” in the air fryer keeps the meat tender and prevents it from drying out, so you don’t even need a brine. Thin pieces also mean more surface area for seasoning, so every bite is flavorful.
- High Heat Air Frying: Air fryers circulate very hot air around the food, creating a beautiful golden-brown exterior while locking in juices. Cooking at around 400–415°F gives you lightly crisp edges and a moist interior in minutes. Essentially, you get the effect of roasting or grilling in a fraction of the time, perfect for keeping lean chicken breasts from overcooking.
- Flavorful Seasoning & Light Oil: A generous spice rub coats each piece of chicken, ensuring no piece is left bland. Simple spices like paprika and garlic powder build a smoky, savory flavor without overwhelming the chicken. A small amount of oil helps the spices stick and promotes browning. We even toss in a little cornstarch (optional) – this is a pro tip that helps create a lightly crispy, golden crust on the chicken’s surface. The end result is chicken that’s well-seasoned on the outside, tender on the inside, and incredibly delicious.
Ingredients Overview
You don’t need any fancy ingredients for this recipe – just a few staples will do. Here’s what you’ll need:
- Chicken Breasts: Use boneless, skinless chicken breasts. For best results, slice them thinly. You can either buy thin-cut chicken breast cutlets or slice whole breasts in half horizontally yourself. Thinner pieces ensure faster cooking and juicier meat. If your chicken breasts are very large, cutting them into 2–3 thinner fillets each will help them cook evenly.
- Oil: A little oil helps achieve that golden exterior. Use a neutral, high-heat cooking oil such as olive oil, avocado oil, or vegetable oil to lightly coat the chicken. These oils can handle the air fryer’s high temperature and will help the seasoning stick. (Avoid using butter or low-smoke-point oils at 415°F, as they could smoke or burn.)
- Seasonings: We toss the chicken in a simple spice mix made from pantry staples. You’ll need paprika (for color and mild smokiness), garlic powder and onion powder (for savory flavor), plus salt and black pepper to season and balance everything. This all-purpose blend gives great flavor to the chicken. Feel free to adjust the quantities to your taste – for example, add a pinch of cayenne for heat or some dried herbs (like oregano or thyme) for extra aroma.
- Cornstarch (Optional): Cornstarch is an optional secret ingredient that helps create a light crust on the chicken. Just a teaspoon or so tossed with the spices will absorb moisture from the surface and crisp up the exterior as the chicken air-fries. It’s the same trick used in many fried chicken recipes to get a crunchy coating. If you don’t have cornstarch, you can skip it, but it does add a nice touch of crispness. (Alternatively, a bit of arrowroot or potato starch could be used similarly.)
That’s it for the core ingredients! With just chicken, basic spices, and a little oil (plus that optional cornstarch), you’re ready to make a fabulous air-fried chicken that tastes like it took a lot more work than it actually did.
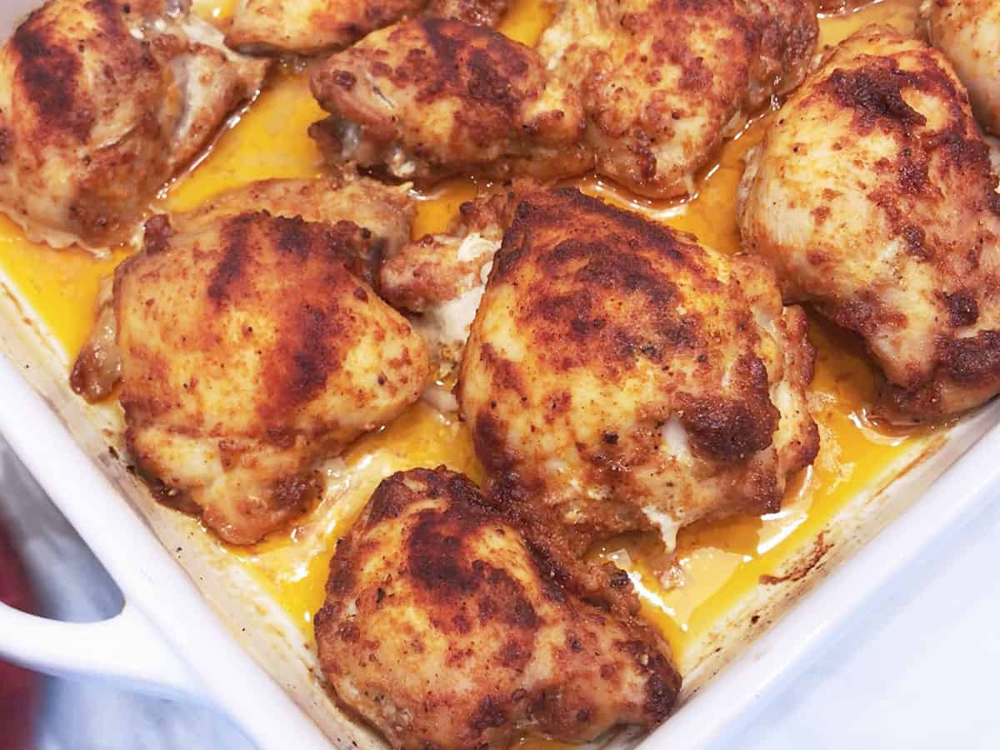
Air Fryer Chicken Breast
My go-to everyday air fryer chicken breast! Thinly sliced chicken breast pieces, coated to the max in spices, plus a bit of brown sugar and cornstarch, and air fried to golden, juicy perfection.
Ingredients
The Spices
- 1 teaspoon paprika
- 1/4 teaspoon smoked paprika
- 1/2 teaspoon garlic powder
- 1/2 teaspoon onion powder
- 3/4 teaspoon salt (I use Morton table salt for this because it’s fine and better for coating)
- 1 1/2 teaspoons brown sugar
- 1 teaspoon cornstarch
The Chicken
- 2 teaspoons avocado oil
- 1 pound boneless skinless chicken breasts – if you have closer to 1.5 pounds in your package, increase the amount of spices above by 1.5x to make sure you have enough seasoning for your chicken
Instructions
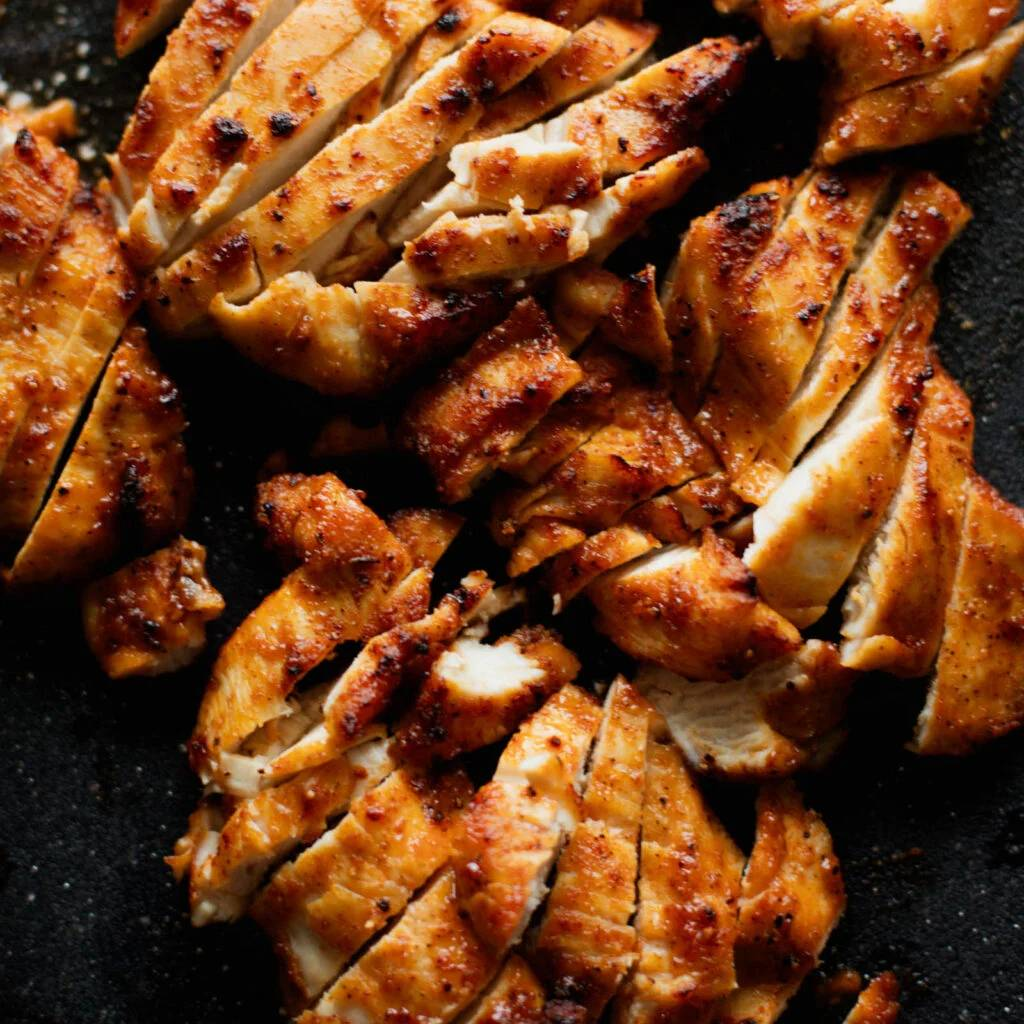
- Cut the the chicken into thin pieces: Cut each chicken breast into thin, flat pieces (not bite-sized but something that looks like a thin chicken breast). For example: if a one-pound package gives me two chicken breasts, I’m often cutting it into 3-4 thin pieces per breast. Thin chicken is essential! And delicious! Pat the chicken breasts dry if they have a lot of moisture on them.
- Coat the chicken with spices: Toss the spices together so they’re mixed well; sprinkle mixture over the chicken pieces in a bowl. Add the oil and toss (I use my hands but tongs will work). You want to thoroughly coat the chicken. You can give it a short rest if you want, but I find that the flavor is excellent even if it just goes straight into the air fryer, and that’s how I usually make it.
- Air fry: Preheat the air fryer. Place the chicken on the air fryer basket / grate in an even layer, leaving a bit of space for air to circulate around. Air fry the chicken at 415 degrees for 10 minutes. If you have larger pieces of chicken, you’ll want to go closer to 13 minutes. You’re looking for an internal temperature of 165 degrees.
- You’re done! Yum! It should be a gorgeous sight for hungry eyes. Crisped on the outside, full of flavor, and juicy to the max. Let it rest for a moment; then slice into it and enjoy. We often eat at least half of it just hot out of the air fryer while standing over the cutting board. I am on a kick with dunking the chicken pieces in a house-made gochujang dipping sauce which is in the notes below!
Notes
Salt Depends on The Amount of Chicken: And the salting is important. Here’s what I recommend.
Marinating: You can let the chicken sit with the spices for an extended period of time – up to 24 hours in the fridge – but for best results, wait to add the cornstarch until just before you throw it in the air fryer.
Paprika: For this recipe, paprika refers to the ground spice labeled “ground paprika” or “paprika”. Paprika is great here for flavor and color. There are tons of varieties of paprika out there, including smoked paprika, hot paprika, Hungarian paprika, or sweet paprika. If you follow the amounts as written, you’ll get just a teeny tiny bit of the smoky paprika so it’s just a bit more rich and savory – just that little extra something that makes you go “mmmm” – without being overwhelmingly smoky. To me, as written, it’s the perfect blend. But if you like to play, try other paprika ratios or bring in other spices to your tastes!
Cheat Code for the Seasoning: This recipe is very clutch with McCormick Rotisserie Chicken Seasoning blend. Not sponsored, just so easy and so good. I found a neglected bottle of it when I was cleaning out my spice cabinet and it is DELICIOUS on this chicken. For a pound of chicken, just use about 1 tablespoon of the seasoning mix in place of the paprika, salt, onion and garlic powders. Then add your cornstarch and brown sugar to it and love your juicy, delicious chicken life!
Amazing Gochujang Dipping Sauce: This is my current favorite sauce to have with this chicken, either in a bowl, a salad, or just dipping the chicken pieces straight in. Mix 1/2 cup mayo with about 2 tablespoons gochujang sauce (table sauce, not paste), 1 clove grated garlic, a shot of soy sauce, and a dash of rice vinegar if you want. Season with salt and pepper. Oooof. So good.
Nutrition Information:
Yield:
4Serving Size:
1Amount Per Serving: Calories: 584Total Fat: 19gSaturated Fat: 6gTrans Fat: 0gUnsaturated Fat: 11gCholesterol: 116mgSodium: 641mgCarbohydrates: 73gFiber: 44gSugar: 5gProtein: 53g
Reddit Reviews
- Redditors love the recipe because it looks juicy.


Helpful Tips for Best Results
To ensure your air fryer chicken breasts turn out perfect every time, here are some extra tips and tricks:
- Don’t Overcook – Prevent Dryness: The number one culprit for dry chicken is simply cooking it too long. Because we’re working with thin pieces and high heat, the chicken cooks very quickly. Start checking for doneness a little early (around the 8-minute mark) so you can pull the chicken out as soon as it hits 165°F. Overcooking even by a minute or two can dry it out. Using a timer and a meat thermometer is the best way to get juicy results. Also, remove the chicken immediately once it’s done – do not leave it sitting in the warm air fryer, where residual heat can continue to cook it. If you follow the timing closely, you shouldn’t need to brine the meat or do anything extra to keep it moist – it will already be nice and juicy.
- Customize Your Seasoning: The beauty of this recipe is that you can easily adapt the spices to your taste. The paprika-garlic-onion blend is a great all-purpose seasoning, but feel free to get creative. You can add a dash of chili powder or cayenne for some heat, or some dried herbs like oregano, rosemary, or Italian seasoning for an herby twist. Lemon pepper seasoning or Cajun seasoning blends also work nicely with chicken. If you want to marinate the chicken in your favorite marinade beforehand, you can – just pat off excess marinade before air frying (and be cautious of sugary marinades which might burn at high heat). This recipe is a forgiving canvas for flavor, so adjust the spices as you like.
- Oil Swaps and Amount: You really only need a light coating of oil for this recipe – just enough to lightly moisten the chicken and help crisp the exterior. If you prefer, you can use an olive oil spray to mist the chicken for an even lighter touch. Avocado oil, canola oil, or grapeseed oil are other great options since they tolerate high heat well. Even regular olive oil works fine here (we’re cooking quickly, so smoking isn’t much of an issue). Just avoid using aerosol cooking sprays that contain propellants, as those can damage some air fryer baskets. A brush or pump mister with your chosen oil is best. Remember, any neutral, high-heat oil will do the job – the goal is just to help that chicken brown up beautifully.
- Give Them Space: Air fryers cook by circulating hot air, so proper spacing of the food is crucial. Arrange your chicken in a single layer with a bit of room around each piece. If pieces are touching or piled up, they’ll steam instead of crisp and may cook unevenly. If you need to cook a large amount of chicken, do it in batches for best results. It might take a little longer overall, but the outcome will be much better. Also, halfway through cooking, you can shake the basket or flip the pieces if you notice one side browning more than the other – this helps ensure all sides get exposed to that hot air. (Many small/thin pieces don’t even need flipping, but it can be useful for slightly thicker cuts.)
- Use the Right Temperature: We recommend 415°F for thin chicken breasts to get that ideal balance of quick cook time and browning. If your air fryer runs very hot or tends to burn things, you can try 400°F and add a minute or two. On the flip side, if you notice your chicken is getting too brown before reaching 165°F internally, you can lower the temp to 400°F or even 380°F next time. Every air fryer model is a bit different, so don’t be afraid to tweak the temperature or time slightly to suit your specific unit. High heat (around 400°F) is generally best for a nice exterior sear while keeping the inside juicy, so we stick close to that.
By following these tips – avoiding overcooking, seasoning to taste, using a bit of oil, spacing out the chicken, and dialing in the right heat – you’ll get fantastic results consistently. Once you nail down the timing for your air fryer, this recipe will be an easy staple in your rotation.
Serving Suggestions
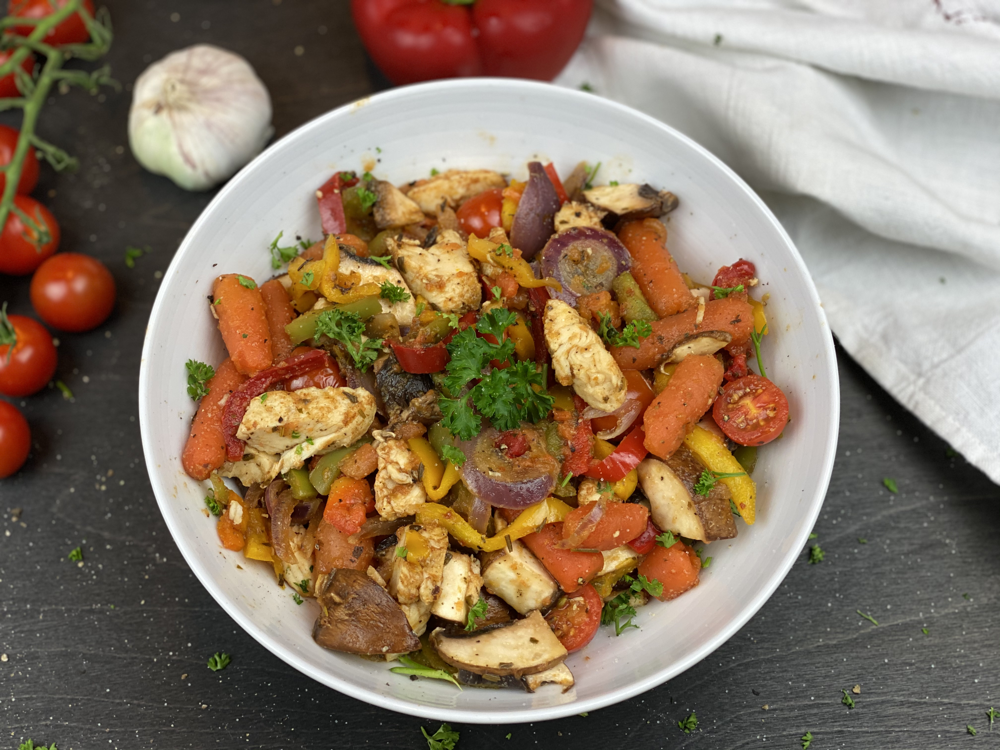
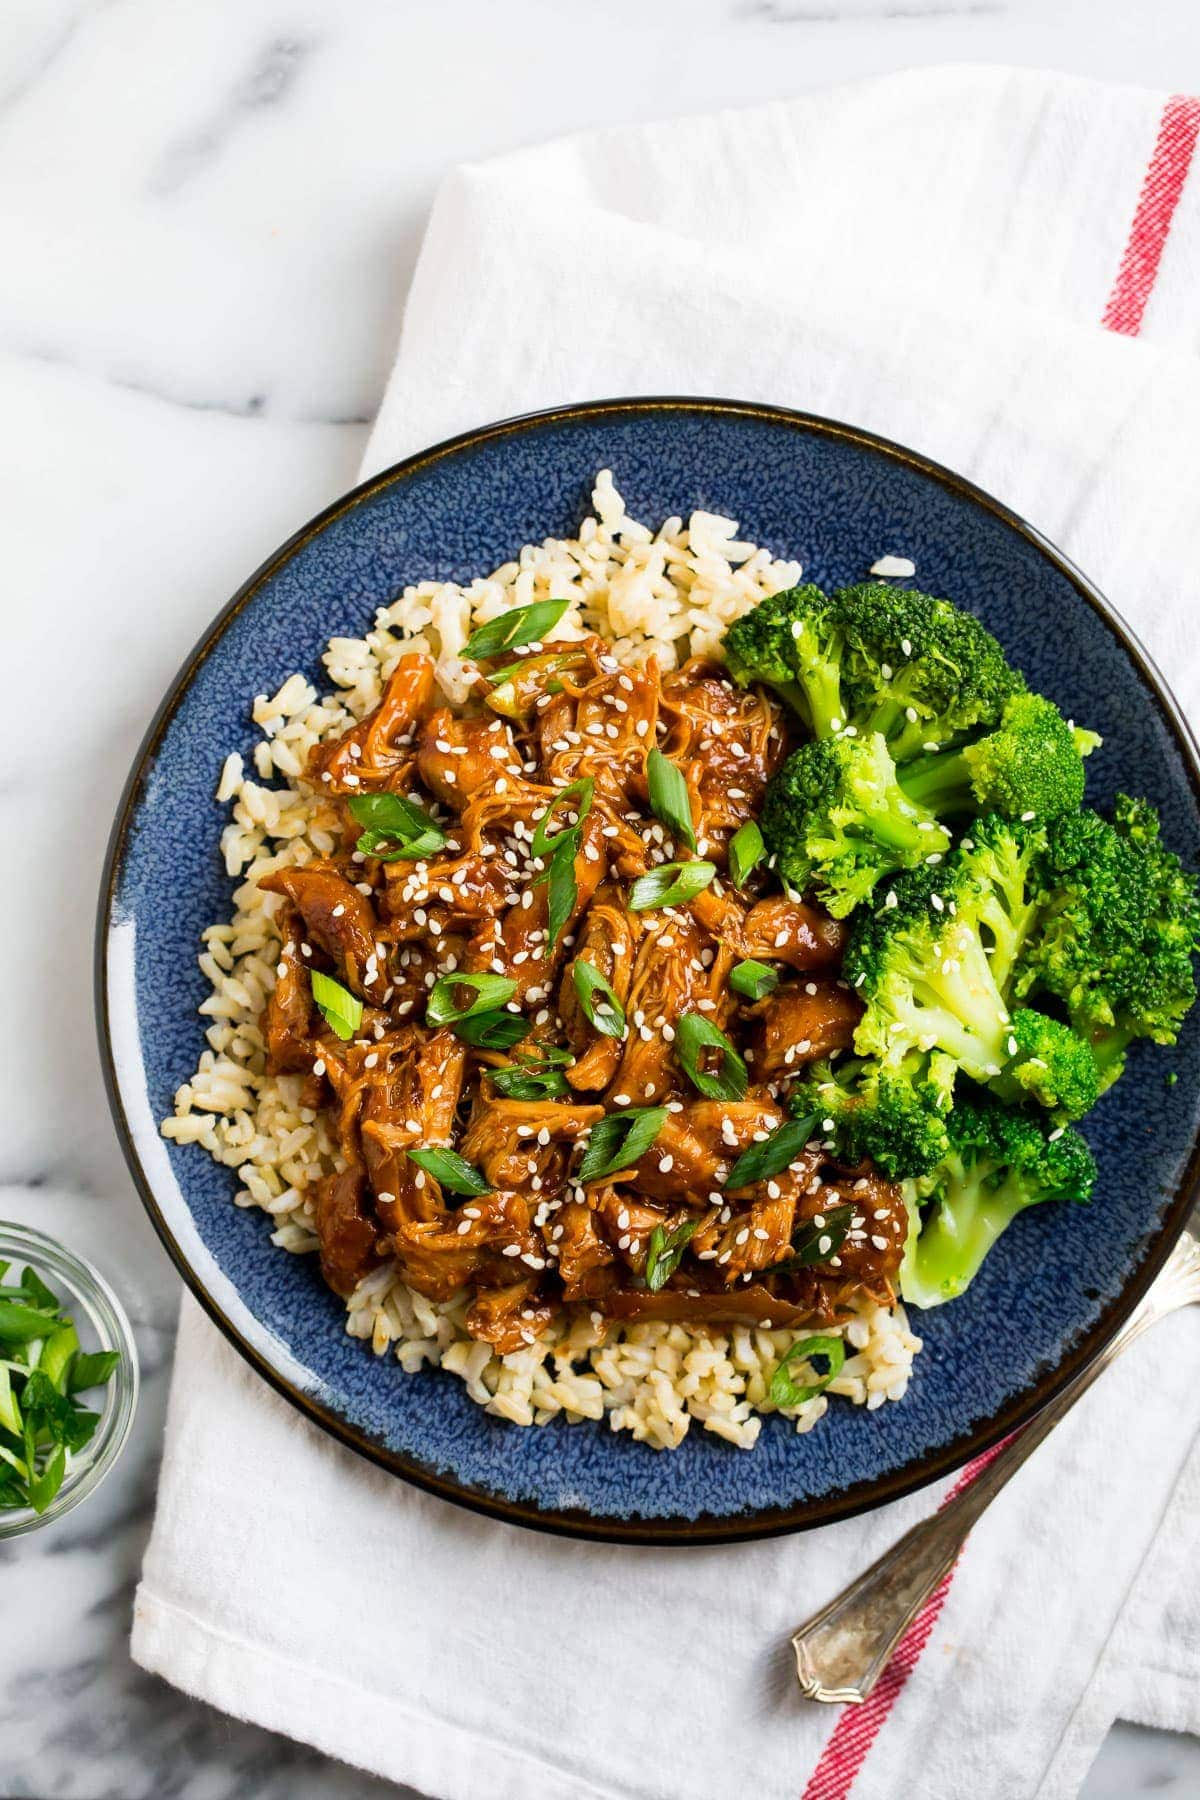
One of the reasons I love this air fryer chicken is how versatile it is. You can use it in so many meals throughout the week. Here are some tasty serving ideas:
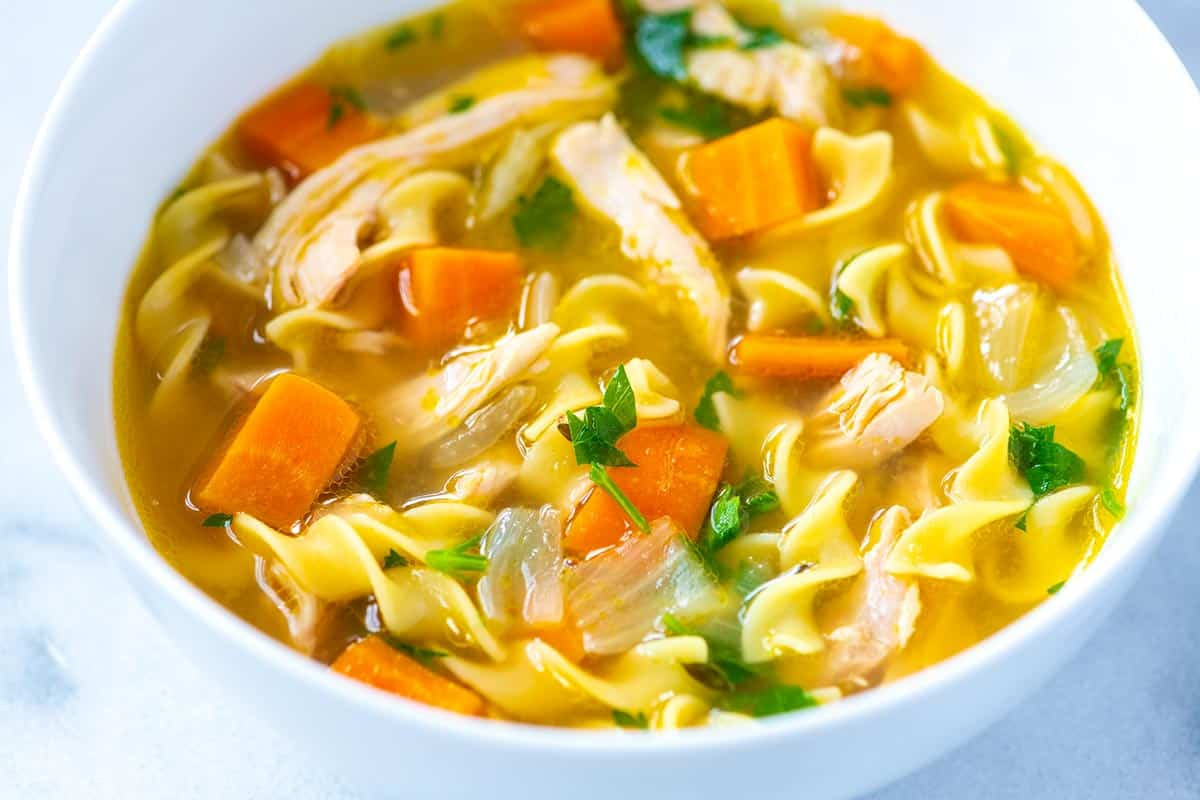
- Rice Bowls: Slice or dice the air-fried chicken and serve it over rice or quinoa with roasted or steamed veggies. Drizzle with a favorite sauce (teriyaki, soy-garlic, or even a yogurt dill sauce) for a quick grain bowl. It’s a perfect make-ahead lunch bowl option.
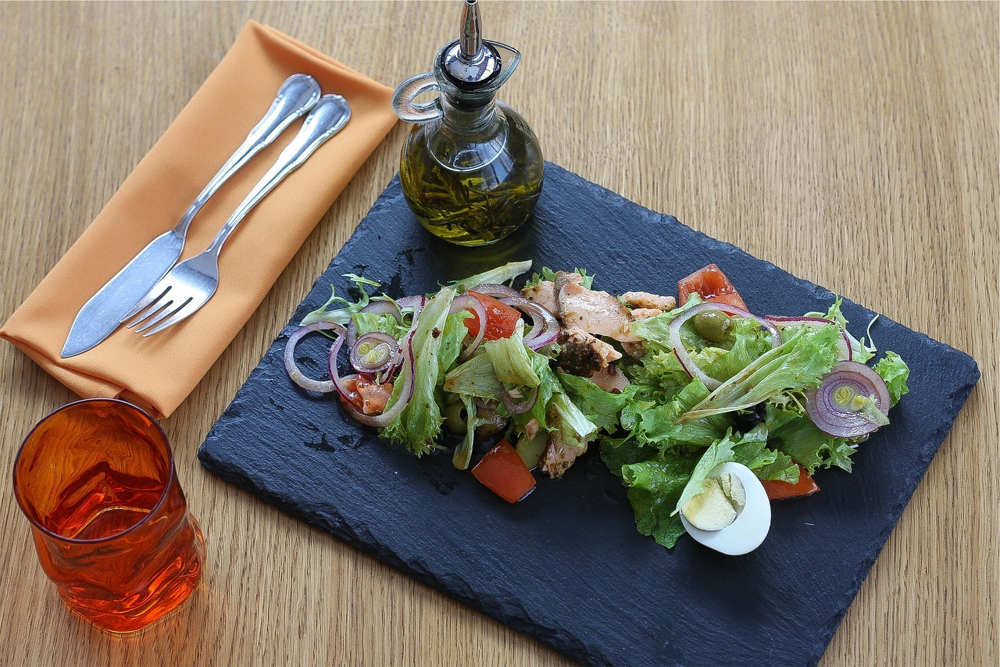
- Salads: Top a fresh green salad with warm slices of this spiced chicken breast for an instant protein boost. It’s excellent on a Caesar salad, a Cobb salad, or a hearty kale salad – the seasoned chicken turns a simple salad into a satisfying meal. Add your favorite veggies, some cheese or nuts, and a good dressing, and you have a nutritious lunch or dinner.
- Tacos or Wraps: Tuck the juicy chicken pieces into tortillas or lettuce wraps. Add taco fixings like shredded lettuce, pico de gallo, avocado, and a squeeze of lime. The bold flavor of the chicken works great for tacos or fajitas. For wraps, you can roll the chicken in a flatbread or tortilla with hummus, tzatziki, or mayo and plenty of crunchy veggies for a delicious chicken wrap.
- Simple Dinner Plate: Serve the chicken as a main entrée alongside your favorite sides. It pairs well with almost anything. Try it with some roasted or air-fried vegetables (like broccoli, Brussels sprouts, or potato wedges) and a crisp green salad on the side. You can also serve it with mashed potatoes, pasta, or on top of buttered noodles for the kids. Another idea: slice it up and toss with pasta and a sauce ( Alfredo, pesto, etc.) for a quick chicken pasta.
- Dipping and Snacks: The flavorful, bite-sized pieces of this chicken are also great on their own as a snack or appetizer. Serve them with some dipping sauces – barbecue sauce, ranch, honey mustard, or a spicy sriracha mayo are all tasty choices. It’s like having your own homemade chicken tenders, but lighter since they’re air fried.
As you can see, there are endless ways to enjoy these air fryer chicken breasts. Whether you add them to a healthy bowl, a big salad, wrap them up, or pair with veggies and starch for dinner, you really can’t go wrong. It’s a fantastic meal-prep item too – cook a batch of chicken, and use it in different dishes over a few days. The flavor is neutral enough to fit many cuisines, yet tasty enough to stand on its own. Enjoy experimenting with your favorite serving style!
Storage and Reheating
Made more chicken than you can eat at once? No problem – these air-fried chicken breasts store well and can be used later. Here’s how to store leftovers and reheat them safely:
- Refrigerating Leftovers: Let the cooked chicken cool down slightly (you don’t want to trap steaming hot chicken in a container). Then store the chicken in an airtight container and pop it in the fridge. Cooked chicken will last about 3 to 4 days in the refrigerator when stored properly. For best results, refrigerate it within 2 hours of cooking (to keep it food-safe) and keep it at 40°F or below. I like to slice the chicken before refrigerating, so it’s easy to grab and use in sandwiches or salads the next day.
- Reheating in the Air Fryer: Reheating this chicken in the air fryer is a great way to revive the outside crispness. To reheat, preheat your air fryer to about 350°F. (A slightly lower temp is better for reheating so the chicken warms through without drying out or getting too brown.) Place the leftover cooked chicken in a single layer in the basket (don’t overcrowd, so it heats evenly) and heat for about 3–5 minutes until warmed through. Thin slices or smaller pieces might only need ~3 minutes, while a whole piece might take 5–6 minutes. Using 350°F gives the chicken enough time to heat to the center without the outside getting overcooked. You generally won’t need to flip it, but you can shake the basket or turn the pieces halfway if you want. Keep an eye on it – you just want to warm the chicken, not cook it further. The chicken is ready when it’s hot and the internal temp goes back up to 165°F. Tip: Avoid using the “keep warm” function for too long, as low heat for an extended time can dry the meat out. A quick reheat at higher heat works better.
- Reheating in the Microwave: You can also microwave the leftover chicken if you’re in a hurry (though it won’t have any crispness). Cut the chicken into pieces and place on a microwave-safe plate. Cover with a microwave-safe lid or a damp paper towel – this traps some steam and helps keep the chicken moist. Microwave in short bursts (start with 30 seconds to 1 minute depending on amount) until heated through. Be careful not to overzap it, as microwave-heating can dry out the chicken quickly. For even heating, stir or flip the pieces halfway through. Once it’s hot (again, you can check that it reaches 165°F if unsure), it’s ready. Microwaved chicken tends to be a bit softer, so it’s best used in things like wraps, quesadillas, or casseroles rather than expecting a crispy texture.
- Freezing: If you want to store the cooked chicken longer, you can freeze it. Place the cooled chicken pieces in a freezer-safe zip-top bag or container. Try to remove as much air as possible (this helps prevent freezer burn). Label it with the date. Frozen cooked chicken is best used within about 3 to 4 months for optimal taste and texture, though it will remain safe to eat beyond that if kept frozen (quality just might degrade). To use frozen chicken, it’s easiest to thaw it in the refrigerator overnight and then reheat as above. You can also reheat from frozen in the air fryer – just add a few extra minutes and perhaps use a slightly lower temperature initially so it heats evenly. (For example, heat at 330°F for a couple minutes to thaw, then increase to 380°F for a few more minutes to heat through and get the outside warm.) Always ensure the chicken is hot and reaches 165°F in the center after reheating from frozen. Once you’ve reheated frozen chicken, it’s best not to refreeze it – use it up.
By following these storage tips, you can safely enjoy your air fryer chicken later without losing much quality. The quick air fryer reheat really brings it back to life, so you’ll still have that tasty meal ready to go!
FAQ
What if my air fryer only goes to 400°F?
No worries at all – 400°F is plenty hot to make great air fryer chicken. If your air fryer maxes out at 400°F, simply cook the chicken at 400°F. You might need to add a minute or two to the cook time compared to 415°F. In practice, readers have found that adding about 1–2 extra minutes at 400°F yields the same juicy, browned result. So instead of 10 minutes, check the chicken around 11–12 minutes. As always, ensure the internal temp hits 165°F. The difference between 400°F and 415°F is not huge, so your chicken will turn out just fine. It’s better to cook a tad longer at 400°F than to force an unsupported temperature. Keep an eye on it the first time, and you’ll get the timing perfect for future batches.
Can I use frozen chicken breasts?
It’s recommended to thaw the chicken breasts first for the best results. When the chicken is frozen solid, the seasoning won’t stick well and the outside may dry out before the inside cooks through. If you have frozen chicken breasts, try to thaw them in the refrigerator overnight or use the defrost setting on your microwave before prepping this recipe. In a pinch, you can cook from frozen in the air fryer, but you would need to cook at a lower temperature initially and for a longer time, and the texture may not be as good. For example, you might start at 350°F to thaw/cook the chicken through, then raise to 400°F at the end to brown it – but overall it could take 18–20+ minutes and still not absorb seasoning as well. Thawing is definitely worth it for juicy, evenly cooked chicken. Once thawed, pat the chicken dry, slice and season it, and proceed with the recipe. If you find yourself using frozen chicken often, consider prepping and freezing thin sliced chicken with marinade so you can air fry directly (but that’s another topic!). For this recipe, plan ahead to use thawed chicken for the best outcome.
Do I need to brine the chicken?
No, brining isn’t necessary for this recipe. The combination of slicing the breasts thinly and cooking them quickly at high heat keeps the chicken plenty juicy on its own. A traditional brine (soaking in salt water) can add moisture and seasoning, but with these thin pieces we get a lot of surface flavor from the spice rub and the meat doesn’t stay in the cooker long enough to dry out. In fact, skipping the brine saves you time and this recipe still yields tender chicken. That said, you can brine or marinate the chicken beforehand if you want to infuse additional flavor (for example, a simple 30-minute saltwater brine, or a marinade with herbs and lemon). Just be sure to pat the chicken dry before seasoning and air frying, so it still gets that nice exterior sear. But generally, thin-cut, well-seasoned, air-fried chicken comes out juicy without any brining step, making this recipe quicker and weeknight-friendly.
Can I cook full chicken breasts without slicing?
Yes, you can air fry whole (thicker) chicken breasts, but you will need to adjust the cooking time. If you prefer not to slice the chicken or if you have pre-cut chicken breast fillets that are thicker, plan on a longer cook and possibly slightly different technique. For a standard full chicken breast, air fry at 400–415°F for around 13–15 minutes, flipping halfway, then check the internal temperature. Many average-sized breasts (8 ounces or more) will take at least 13 minutes and sometimes up to 16-18 minutes to reach 165°F in the center. It’s very important to use a meat thermometer with thick pieces to avoid undercooking or overcooking. Also, I suggest pounding the breast to an even thickness if it’s quite thick on one end – this helps it cook uniformly. Keep in mind that a whole breast won’t have as much seasoning-to-meat ratio as sliced pieces (since we normally coat the outside), and the exterior might not get quite as brown by the time the center is done. For these reasons, I prefer slicing them. But if you do cook them whole, just be patient with the time and perhaps give them a brush of oil and extra seasonings. The result can still be great – you’ll have a nicely roasted-style chicken breast. Let it rest a few minutes after cooking, then you can always slice it after cooking for serving.
Do I need to preheat the air fryer?
Preheating is recommended for the best results. Starting with a hot air fryer means the chicken begins cooking and searing immediately, which helps develop that browned exterior. In my experience, preheating for around 3–5 minutes to about 400°F works well – my air fryer even makes the chicken sizzle when it hits the preheated basket! If your air fryer model has a preheat button or setting, use it (for example, some preheat at 400°F for a few minutes). If not, just run the air fryer empty at the desired temperature for a short time. While some recipes say preheating isn’t required, I find that for meats like chicken breast, it really does make a difference in texture. You’ll get better browning and a slightly shorter cook time. That said, if you’re in a huge rush you can skip it – just be aware you may need to cook the chicken a minute longer and it might not brown quite as evenly. Overall, taking the time to preheat is worth it for even cooking and a nicely seared, juicy result.
What if my chicken turns out dry?
If your chicken came out dry, a few things might have gone wrong. The most likely issue is overcooking – even a few extra minutes can dry out thin chicken breasts. Next time, try checking the chicken’s internal temperature a bit earlier, or reducing the cook time by a minute or two. Every air fryer runs a little differently, so you may need to fine-tune the timing for your specific machine. Using a thermometer is the best way to know exactly when to pull the chicken (165°F and not much higher). Another factor could be overcrowding the basket – if the pieces were too close together, they might have needed more time to cook through, which can lead to drying. Make sure to cook in a single layer with space, or in batches, so the heat can circulate and cook the chicken quickly. Also, confirm your air fryer temperature setting is accurate; if it runs hot, perhaps the outside overcooked too fast. Thin slicing the chicken as we do in this recipe actually helps prevent dryness by cooking it faster, so don’t cut pieces too thick. Finally, once the chicken is done, take it out of the air fryer promptly (don’t use the keep-warm for this, as that can dry it out). If you follow these steps, you should get moist chicken. However, if you consistently have dry results, you could consider a quick brine or marinade for added moisture – but again, it shouldn’t be necessary here. Focus on accurate timing and temperature. With a bit of practice, you’ll get tender, juicy chicken every time. Enjoy!